Introduction
LetterPress is an all-in-one email plugin for WordPress. It combines a visual email builder, newsletter campaigns, subscriber management, transactional email templates, and reliable SMTP delivery in a single plugin.
Where to get LetterPress
- Regular Version (Free): Download the regular version directly from the WordPress.org Plugin Directory or search for "LetterPress" right inside your WordPress admin dashboard (Plugins > Add New Plugin).
- LetterPress Pro: Unlock AI email generation, deep integrations for WooCommerce (27 events), LMS, memberships, and popular form plugins, plus our expanded library of 50+ pre-made templates by purchasing LetterPress Pro.
Limited Time: Lifetime Deal (LTD) Live Now
We are currently running an exclusive, strictly limited Lifetime Deal on LetterPress Pro. Pay once and secure lifetime access to all current and future Pro features, continuous updates, and premium support, zero monthly subscriptions and zero renewal fees, forever.
This launch window is open for a limited time only. This price will never come back.
What LetterPress does
LetterPress covers the four kinds of email a WordPress site usually needs:
| Area | What you get |
|---|---|
| Unified email design | Every email WordPress sends: password resets, WooCommerce orders, form submissions, appointment confirmations. All go out in one consistent, on-brand template. Set it once, and every touchpoint looks like it came from the same team. |
| Email design | A drag-and-drop builder for professional emails, no HTML required |
| Email marketing | Subscribers, groups, campaigns, scheduling, and reports |
| Email delivery | SMTP and provider integrations so email actually reaches the inbox |
LetterPress Pro adds AI email generation and ready-made integrations for WooCommerce, forms, memberships, and LMS plugins. See LetterPress Pro.
Requirements
Before you install, make sure your server meets the following minimums.
| Requirement | Minimum | Notes |
|---|---|---|
| WordPress | 6.5 or newer | Tested up to WordPress 7.1 |
| PHP | 7.4 or newer | PHP 8.x recommended for best performance |
| MySQL / MariaDB | 5.7 / 10.3 or newer | Standard WordPress database requirement |
| HTTPS | Strongly recommended | Required for Amazon SES SNS event webhooks |
| A sending provider | At least one | SMTP credentials or a supported API provider (Amazon SES, SendGrid, Mailjet, Mailgun, Postmark, Brevo, Resend, SparkPost, MailerSend, Mandrill, SMTP2GO, ZeptoMail) |
LetterPress works with WordPress's built-in wp_mail() out of the box, but connecting a dedicated sending provider dramatically improves deliverability. See Email Delivery to get started.
Installation
- In your WordPress admin, go to Plugins > Add New Plugin.
- Search for LetterPress and click Install Now.
- Click Activate.
To install manually, upload the plugin zip through Plugins > Add New Plugin > Upload Plugin, then activate it.
The LetterPress menu
After activation, LetterPress adds one top level menu to the WordPress admin. Everything lives in one place, so nothing is scattered across wp-admin.
| Page | What it does |
|---|---|
| Dashboard | Overview of your audience, sending health, and campaign activity |
| Campaigns | Create, schedule, and send newsletters |
| Templates | Design emails with the visual builder and manage transactional templates |
| Subscribers | Manage your audience, import and export, bulk actions |
| Groups | Segment subscribers into mailable groups |
| Sources | Track where subscribers came from, with per-source sender identity |
| Subscription Box | Frontend signup form shortcodes for each source |
| API Keys | Keys for the subscriber REST API |
| Cron Setup | Keep campaign queues moving with a server scheduler |
| Settings | Providers, sender identity, deliverability, limits, tracking, and more |
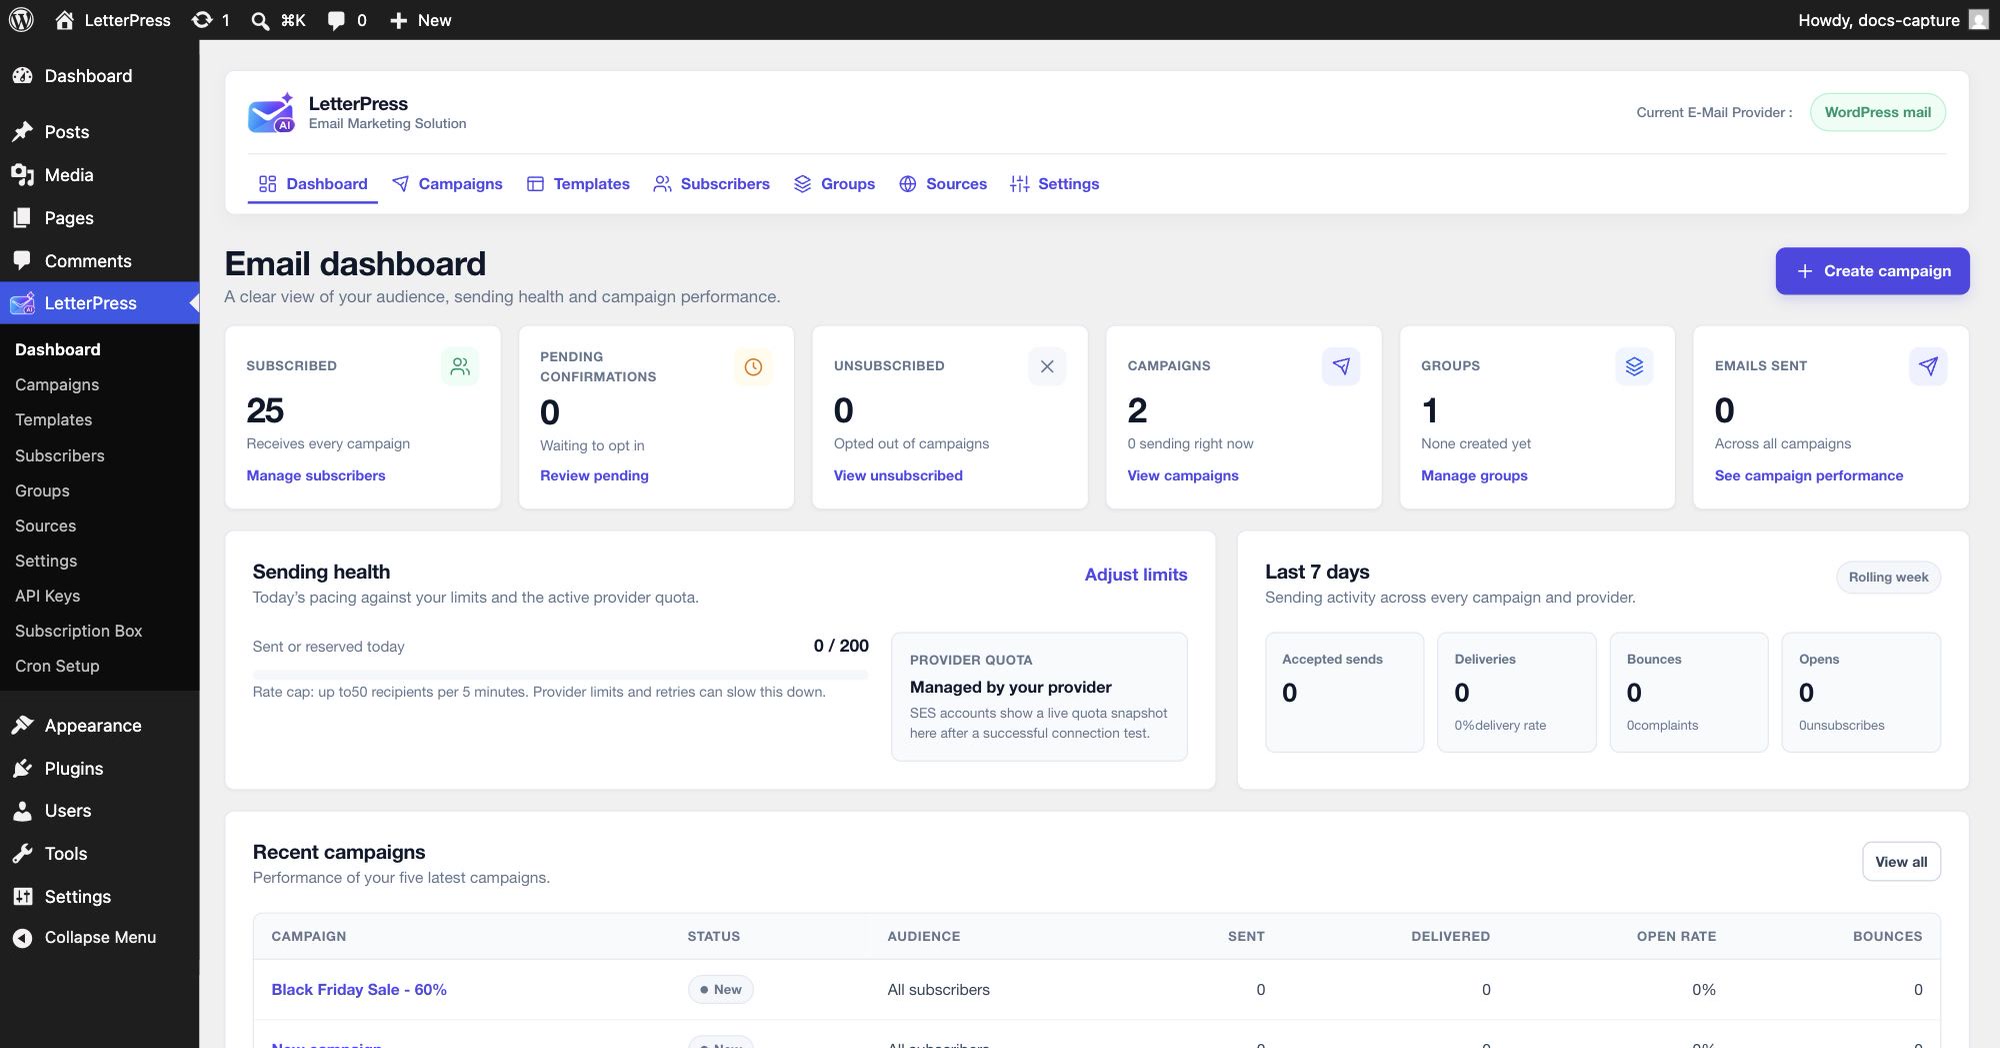
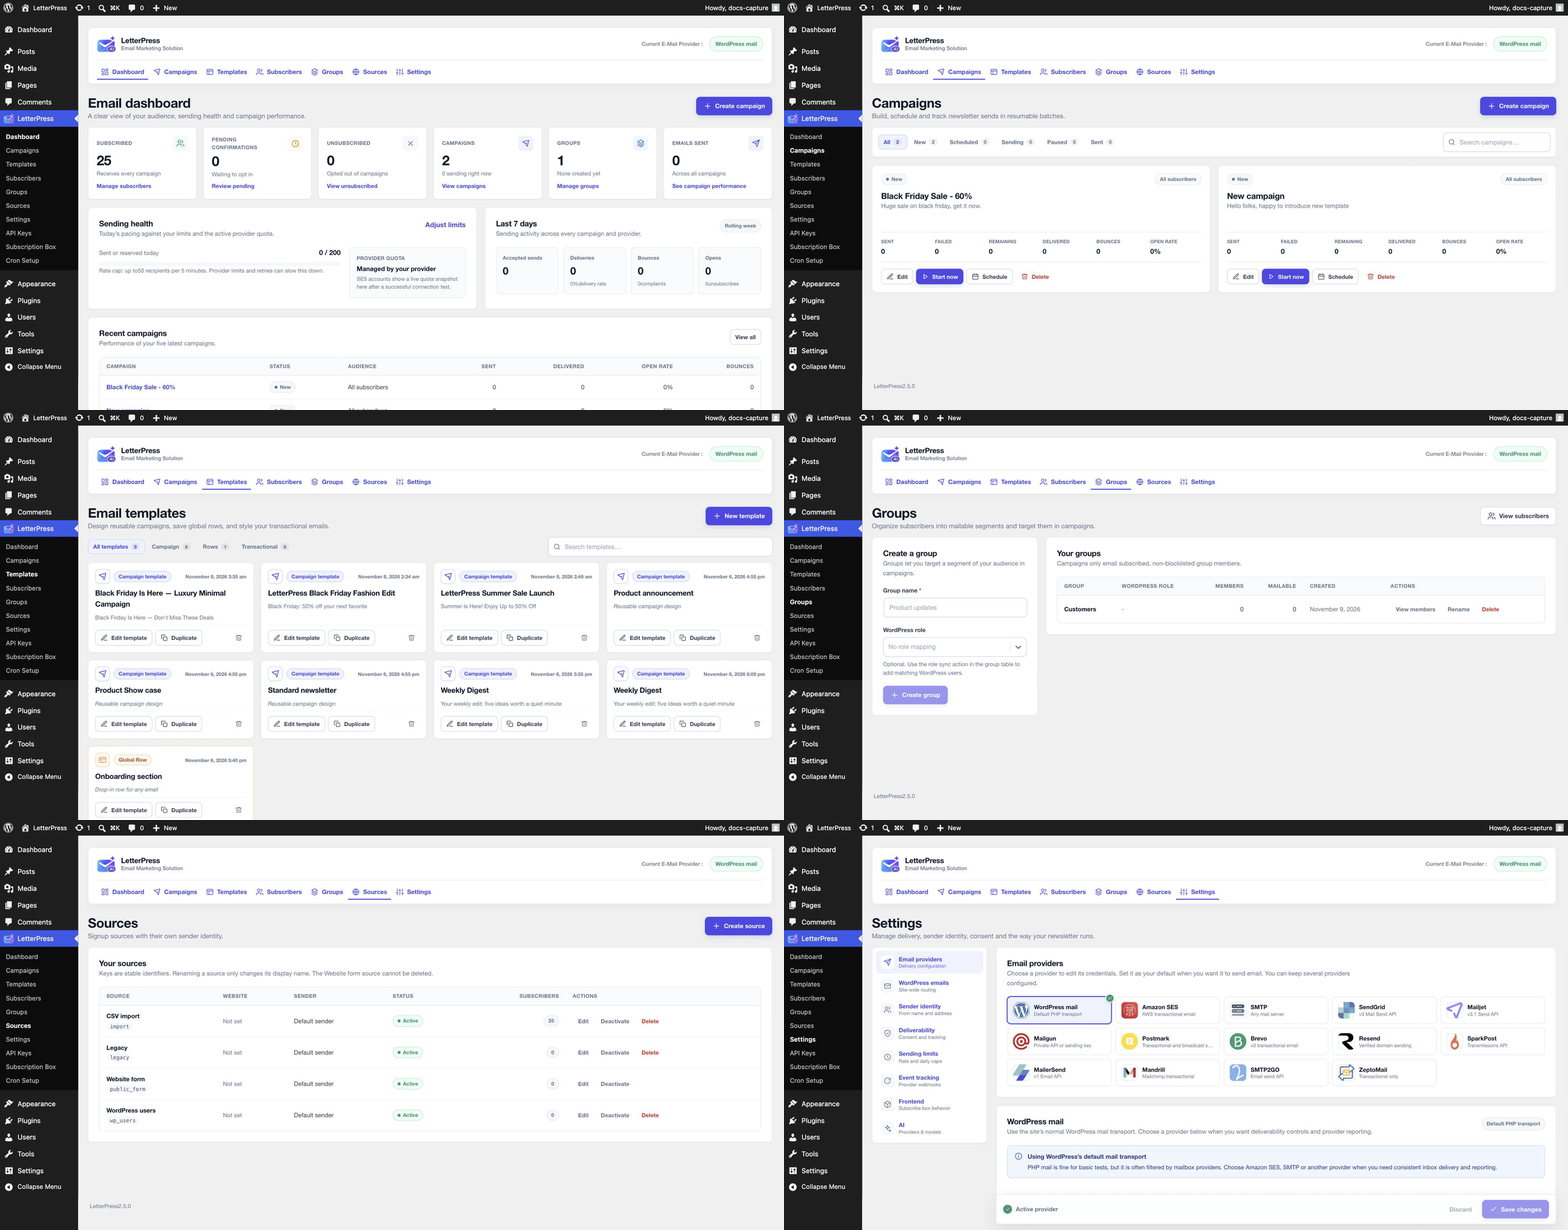
The one minute tour
The fastest way to learn the plugin is a lap around its main screens. This short tour walks through the dashboard, campaigns, templates, subscribers, groups, sources, and settings.
Recommended first steps
- Set up delivery. Open Settings > Email providers and connect your sending provider or SMTP credentials. This is the most important step, because WordPress default emails route through the same setup. See Email Delivery.
- Set your sender identity. Under Settings > Sender identity, add the From name and From address your email will use.
- Design a template. Open Templates and build your first email with the builder. See Email Builder.
- Add subscribers. Import a CSV or connect a signup form. See Subscribers.
- Send a test campaign. Create a campaign, send yourself a test, then schedule or send it. See Campaigns.
Get help
- Browse the guides in the sidebar for step by step tutorials.
- Building an integration? The Developer section covers the REST API, transactional events, and group membership helpers.
- Visit themeqx.com for product news and support.