Subscribers
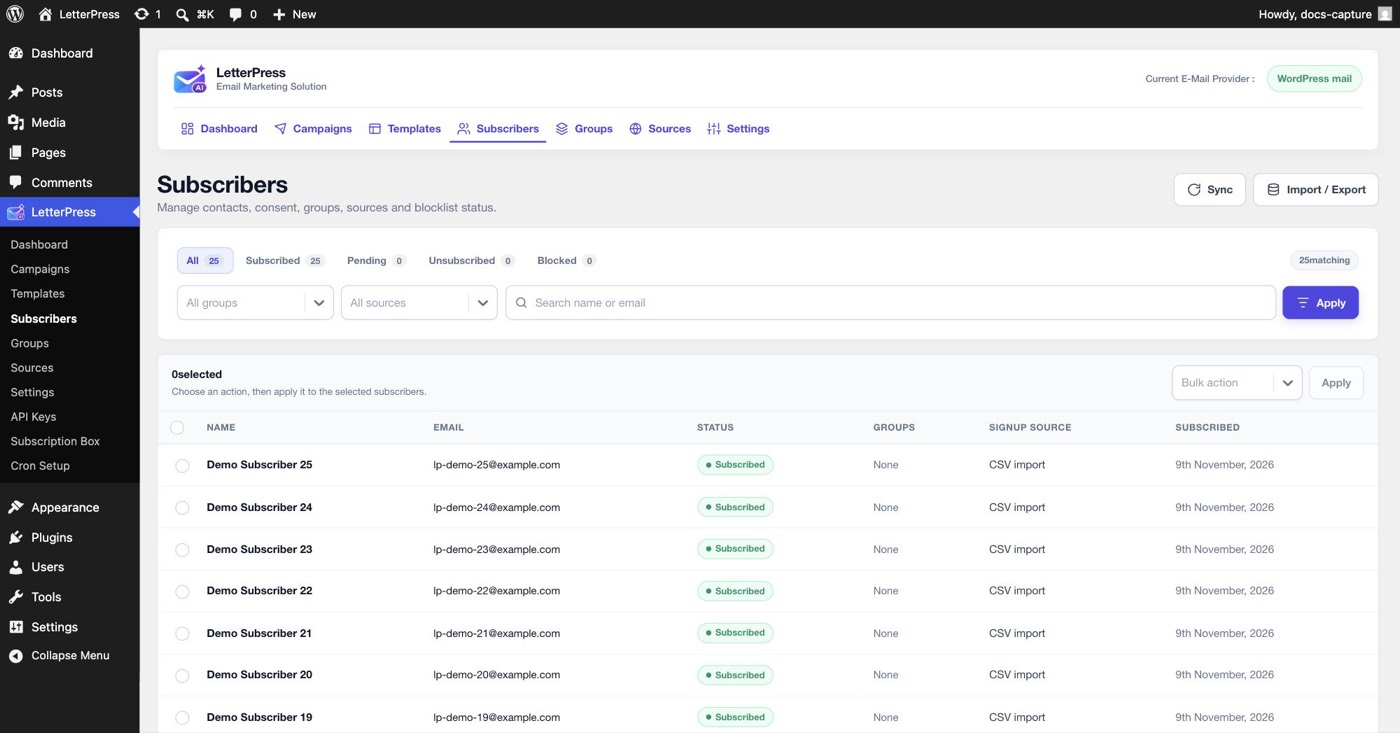
The Subscribers page is your audience. From here you review contacts, filter them, import and export lists, and manage consent status.
Subscriber statuses
Status filters sit above the list:
| Status | Meaning |
|---|---|
| Subscribed | Verified and eligible to receive campaigns |
| Pending | Signed up but has not clicked the confirmation link yet |
| Unsubscribed | Opted out and no longer receives campaigns |
| Blocked | Blocklisted, for example after repeated hard bounces |
Each row shows the subscriber's name, email, status, groups, signup source, and the date the record was created. Use the group, source, and email confirmation dropdowns or the search box to narrow the list. The email confirmation filter helps find contacts whose address has not been confirmed yet.
The list keeps unsubscribed and blocked contacts on record instead of deleting them. That prevents the same address from being re-added by mistake and keeps an audit trail. Use the Block List link below the table to open the full paginated blocklist, described in Blocklist.
Bulk actions
Select one or more rows, choose an action in the bulk bar, then click Apply. Six actions are available:
| Action | What it does |
|---|---|
| Subscribe | Removes any blocklist entry, sets the status to Subscribed, and marks the email as confirmed. Also refreshes the subscription and consent timestamps |
| Unsubscribe | Adds an unsubscribe blocklist entry, sets the status to Unsubscribed, and records the unsubscribe event |
| Block | Adds a manual blocklist entry and sets the status to Blocked |
| Add to group | Adds every selected contact to the target group. Existing members are left alone |
| Remove from group | Removes every selected contact from the target group. The subscribers themselves stay |
| Delete | Deletes the selected subscriber rows and their group memberships. This cannot be undone |
Add to group and Remove from group ask for a target group before they can run. Delete asks for confirmation first.
Delete removes the subscriber entirely. It does not add the address to the blocklist, so confirm you really want the record gone before using it.
Consent and signup records
LetterPress stores a created timestamp for every subscriber. When a contact becomes subscribed, the record also stores subscribed_at and consent_at. For a pending double opt-in signup, those two timestamps are filled when the confirmation link is clicked.
The subscriber schema includes an optional ip field for integrations that supply an address. The built-in public form records the signup and consent timestamps but does not collect the visitor's IP address.
CSV export includes consent_at and created, which gives you a portable consent trail.
Syncing WordPress users
The Sync button opens a dialog with the number of WordPress users who are not in your audience yet. Click Sync users to add them.
Synced subscribers are treated as pre-consented, so they do not need to click a confirmation link. They use the wp_users source and their WordPress display name. Existing subscribers and blocklisted addresses are skipped.
The sync is additive. It never removes a subscriber when the matching WordPress user is deleted or changes role.
Importing from CSV
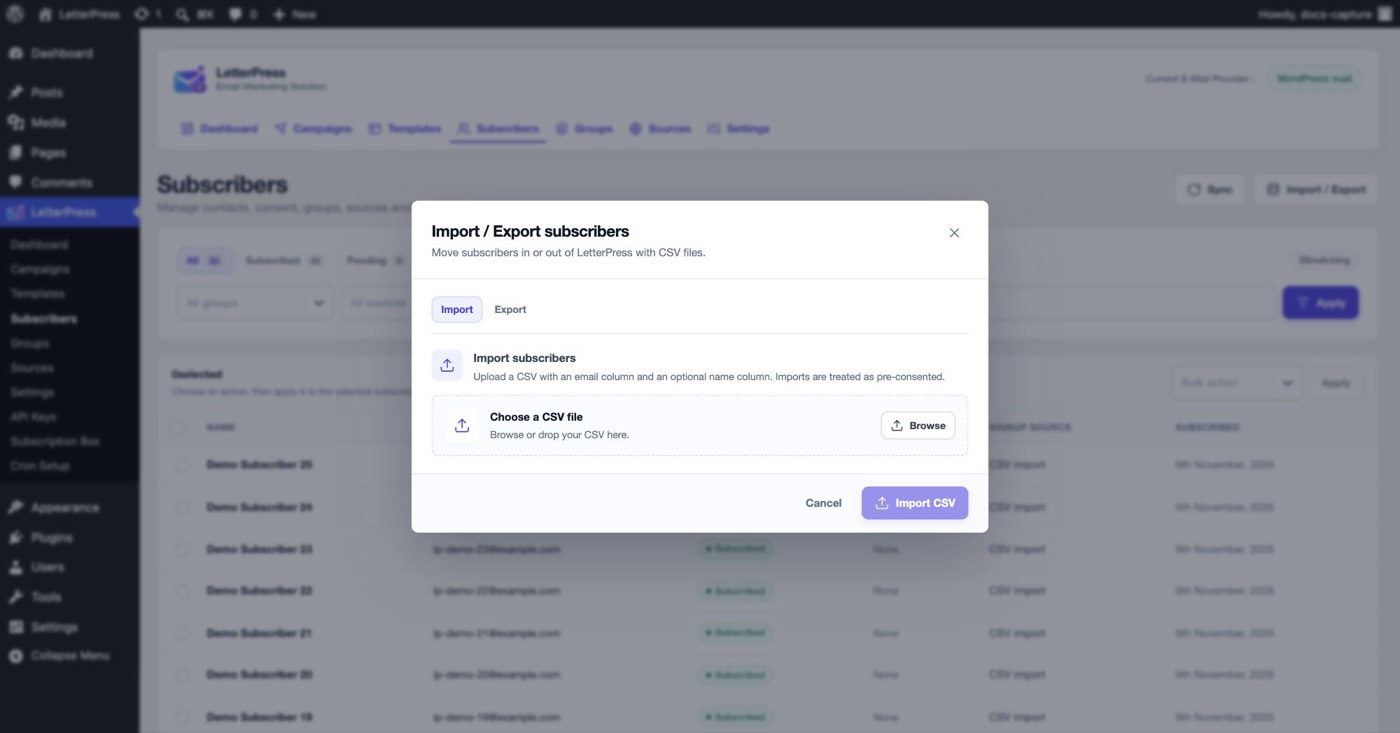
Click Import / Export and switch to the Import tab.
- Upload a CSV file with an email column and an optional name column. You can browse for the file or drop it onto the dialog.
- Click Import CSV.
The importer expects the email in the first column and the name in the second column. A header row is optional. If the first cell contains the word email, LetterPress treats the row as a header and skips it.
Limits and behavior:
- Files must use the
.csvextension and be 10 MB or smaller. - Invalid addresses are skipped.
- Existing subscribers are skipped, not updated.
- Blocklisted addresses are skipped and left blocked.
- Imported subscribers use the
importsource, are marked Subscribed immediately, and count as pre-consented. - The result message reports how many rows were imported, skipped, and left blocklisted.
Only import lists that were collected with permission. Importing is treated as consent, so LetterPress does not send a confirmation email for those rows.
Exporting
Switch to the Export tab in the same dialog. Choose a status or leave it on All statuses, then click Export CSV.
The export contains the columns email, name, status, source, consent_at, and created. Consent timestamps are written in ISO 8601 format, and text cells are escaped so a spreadsheet cannot execute a formula from a subscriber name.
The status selector is the only export filter. Filtering the subscriber list does not change the export. To export one source, use the REST API with the source parameter. For a group, export the full list and filter the CSV by the group membership you need.
REST API
You can add subscribers and list subscribed addresses over the REST API for custom integrations. Create an API key under API Keys to start making requests from your own code. See REST API Keys.
Next steps
- Review and clean suppressed addresses in Blocklist.
- Organize subscribers into segments with Groups and Sources.
- Put a signup form on your site with the Subscription Box.