Email Builder
The Email Builder is a visual, block-based editor. You add rows to a canvas, drop blocks into columns, and style everything from an inspector panel. No HTML, CSS, or PHP knowledge is required.
Open it from LetterPress > Templates, then click New template or Edit template on an existing design.
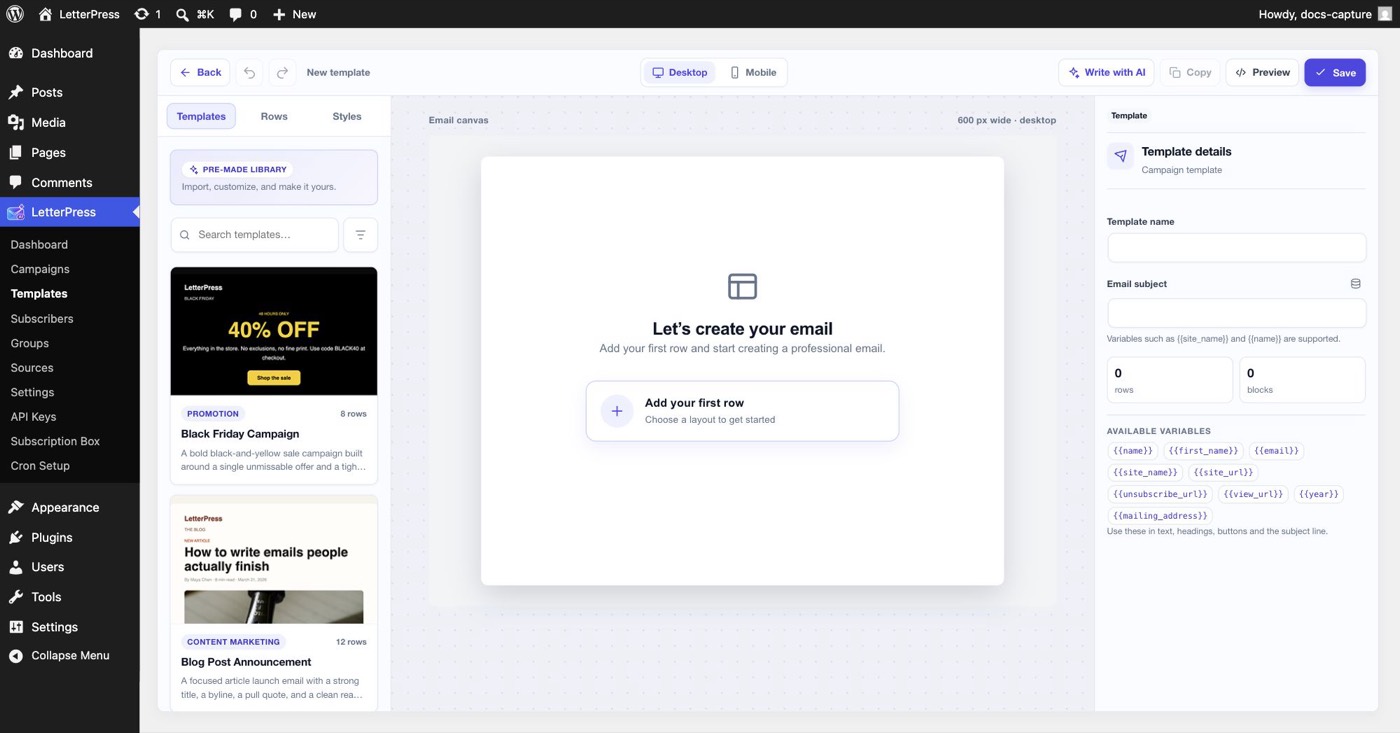
The builder layout
The builder has three areas:
- Library, on the left. Three tabs: Templates for the pre-made library, Rows for your saved rows, and Styles for global email settings.
- Canvas, in the center. A 600 pixel wide preview of the email. Toggle Desktop and Mobile in the toolbar to check both layouts.
- Inspector, on the right. Shows details for whatever is selected: the template, a row, a column, or a block. A breadcrumb at the top shows exactly what you are editing.
The toolbar adds undo, redo, an unsaved-changes indicator, Copy to duplicate a saved campaign template, Preview, and Save. With LetterPress Pro you also get Write with AI. See AI Email Generation.
Undo, redo, and shortcuts
The builder keeps up to 60 steps of history for the current session. Use the toolbar arrows or these keyboard shortcuts:
| Action | Shortcut |
|---|---|
| Undo | Ctrl/Cmd + Z |
| Redo | Ctrl/Cmd + Shift + Z or Ctrl + Y |
| Save | Ctrl/Cmd + S |
Undo covers content and style changes on the canvas. Choosing a different template starts a fresh history. Saving keeps the current history, so you can still undo changes made before the save. Copy is disabled for a new, unsaved template and for transactional events, which have one template per event.
Start from a pre-made template
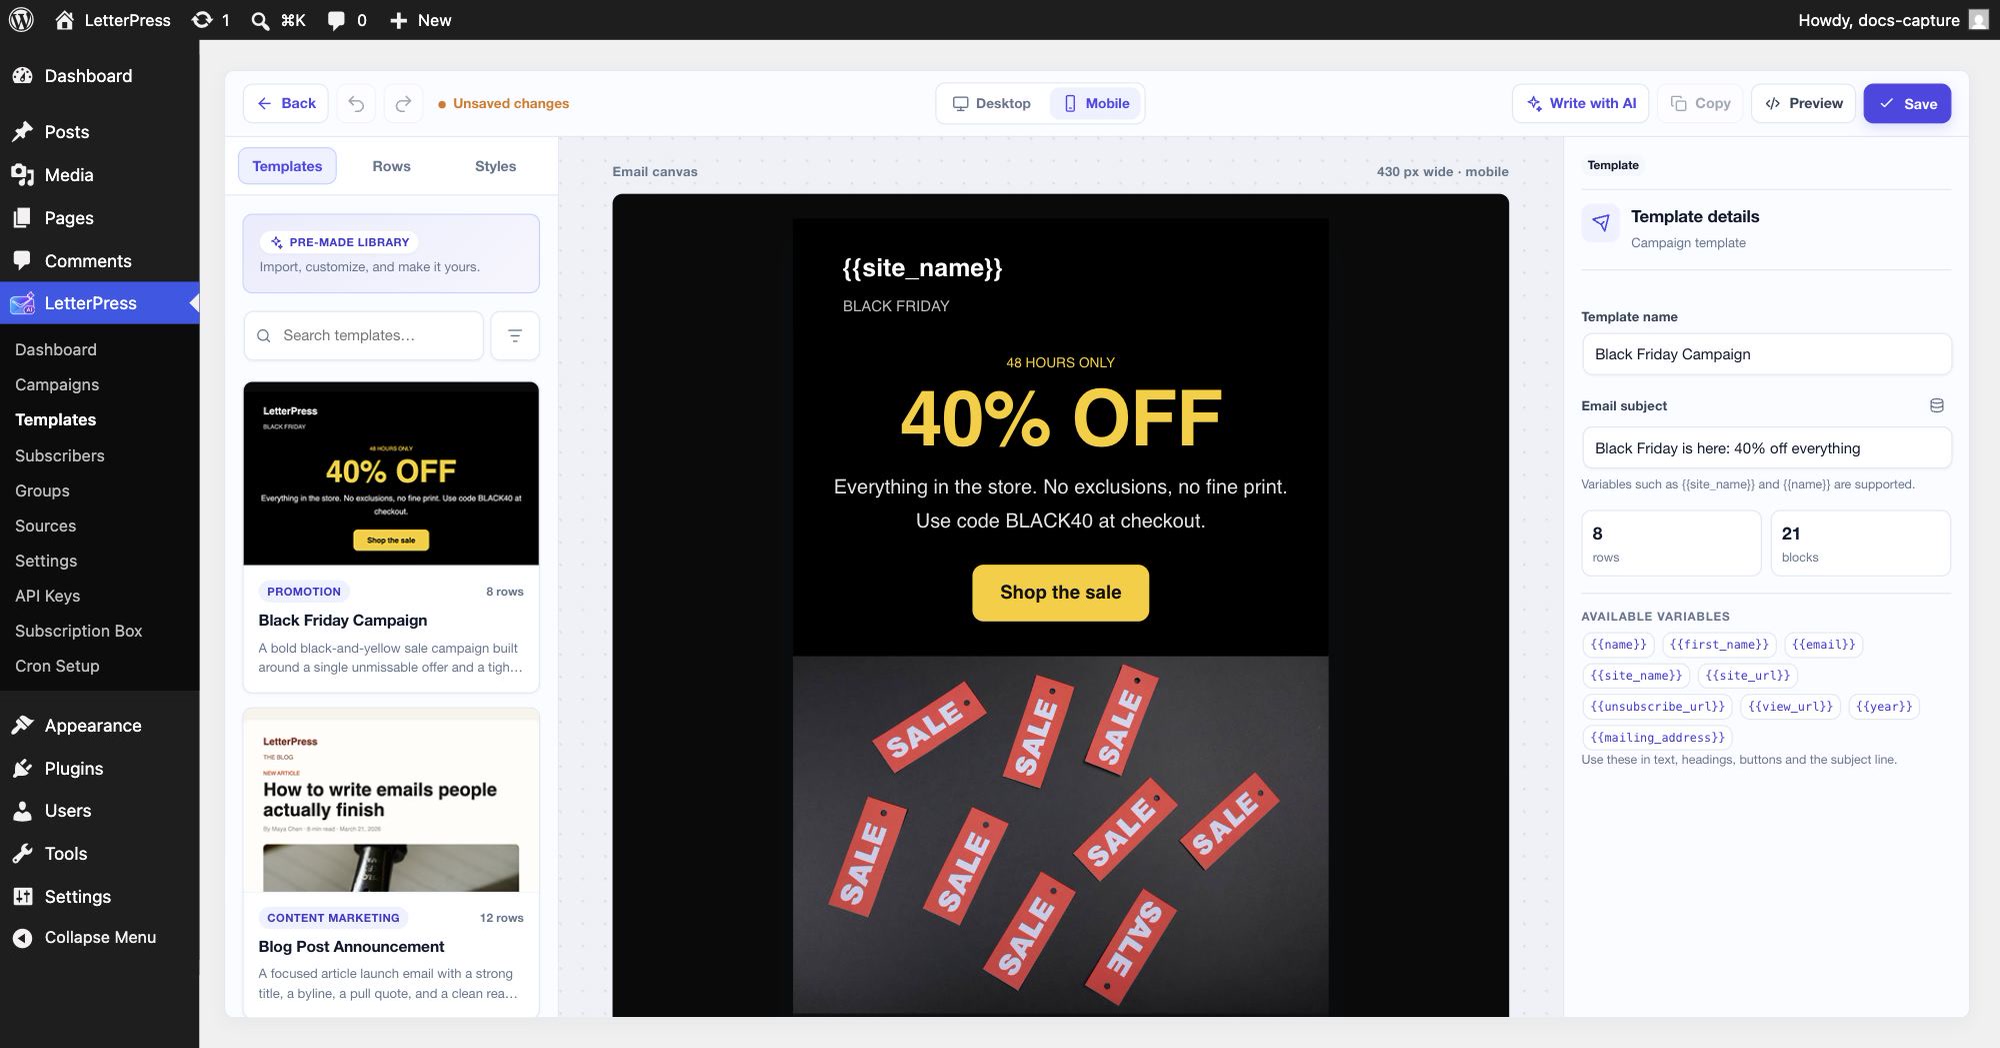
The Templates tab in the library lists professionally designed layouts, each labeled with its category and row count, for example a black Friday promotion or a blog post announcement. Click a thumbnail to load it into the canvas, then edit the content as if you had built it yourself.
You can also click Try a Ready-Made Template from the empty canvas.
Building from scratch
Add rows
Rows are the horizontal sections of your email. Each row holds one or more columns.
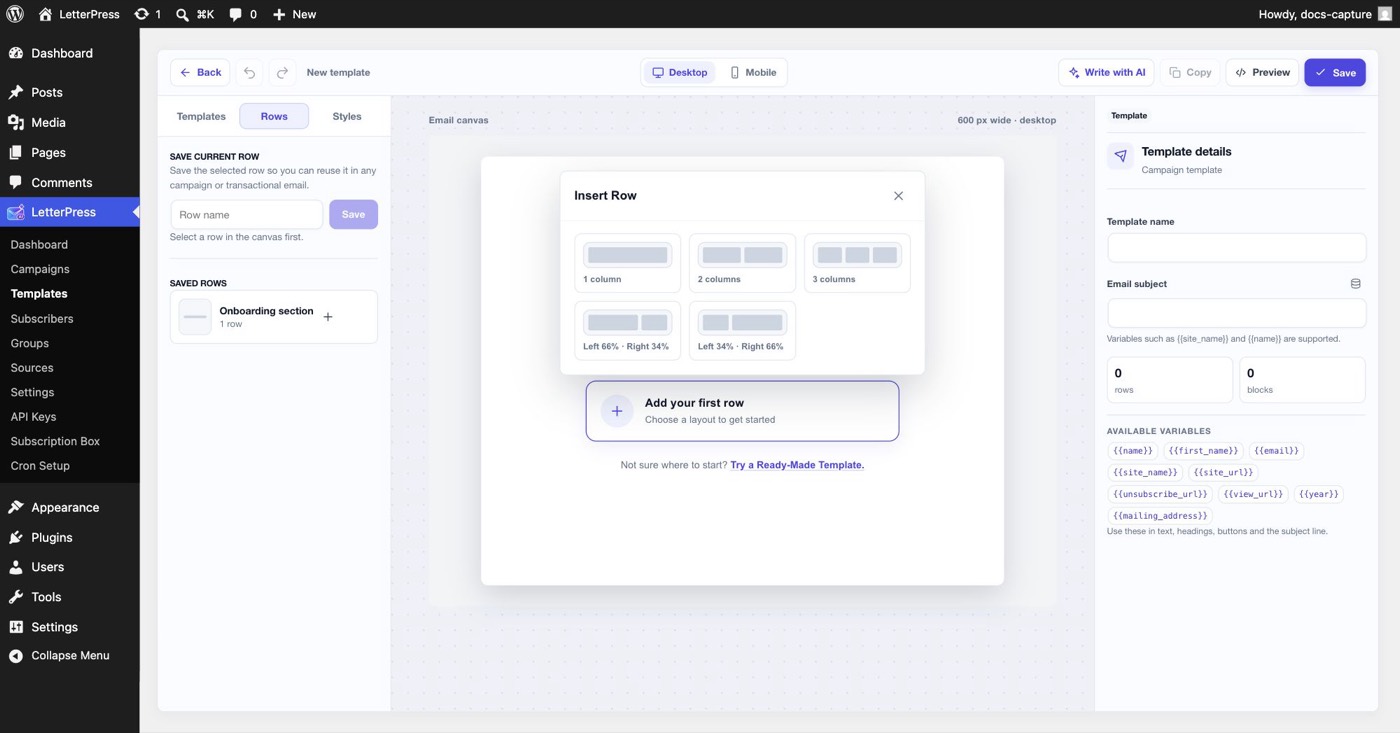
- Click Add your first row, or the add button between existing rows.
- Pick a layout in the Insert Row dialog: 1, 2, or 3 equal columns, or a 66/34 or 34/66 split.
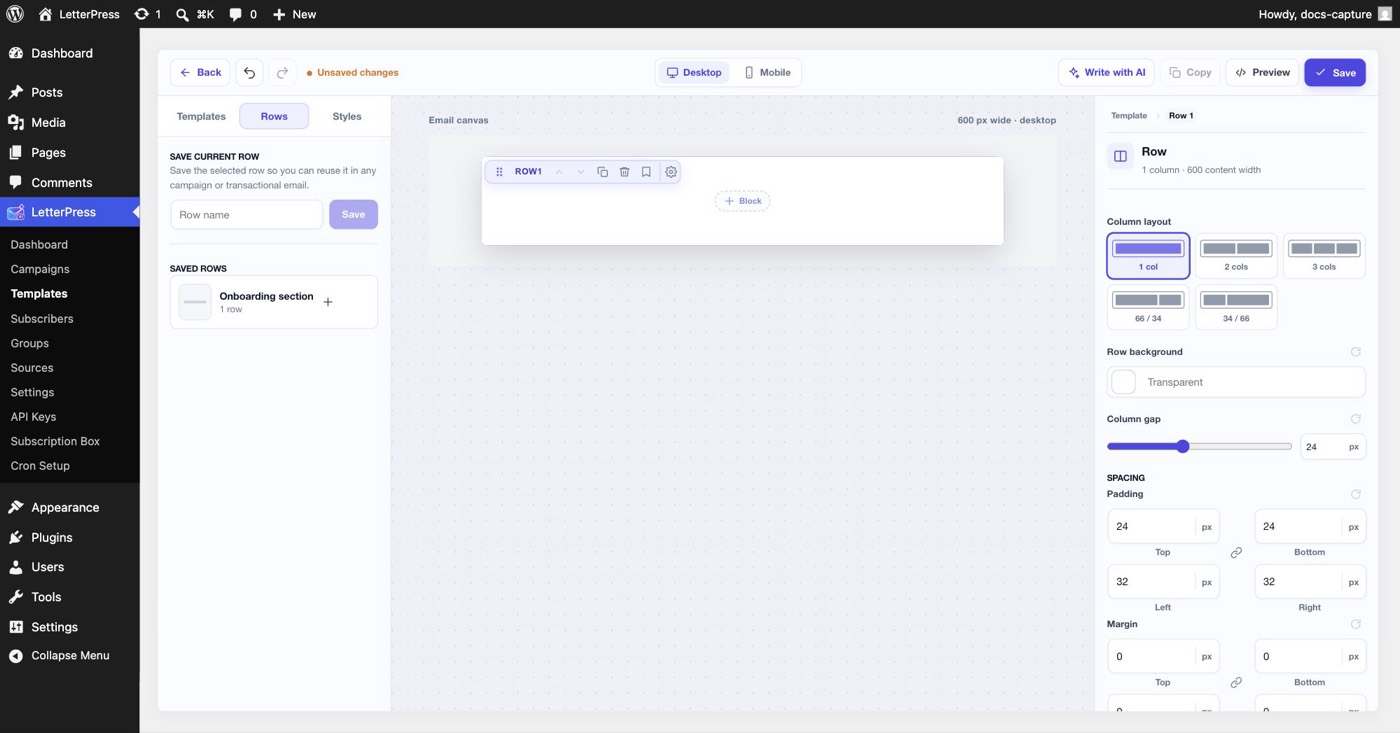
- The row appears on the canvas with its own toolbar: drag to reorder, move up or down, duplicate, delete, save as a row, and open row settings.
Style the row
With a row selected, the inspector shows its settings: column layout, row background color, column gap, padding, and margin. Every row and column shares these controls, so once you learn them you can style any section quickly.
Add blocks
Blocks are the content pieces that live inside columns.
- Hover over a column and click + Block.
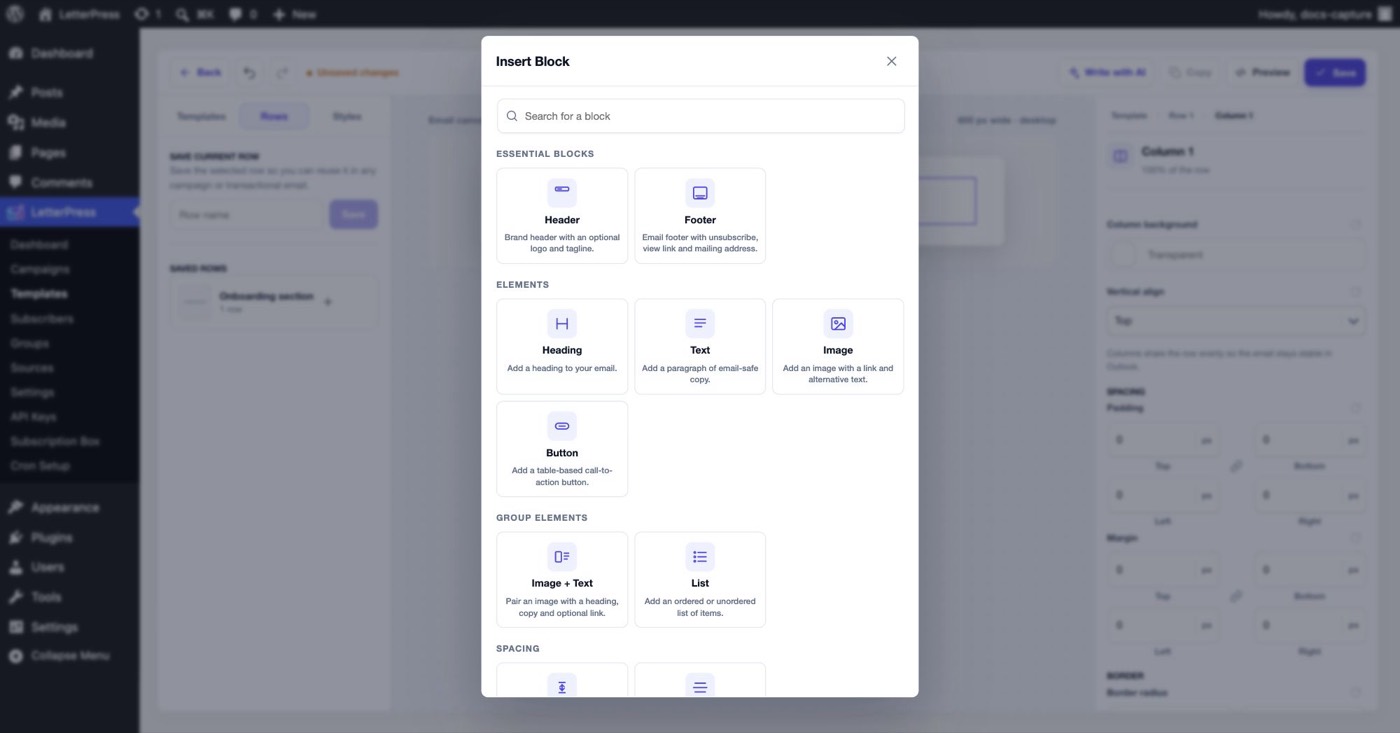
- Pick a block in the Insert Block dialog, or search for one by name.
| Category | Blocks |
|---|---|
| Essential blocks | Header with brand logo and tagline, Footer with unsubscribe link and mailing address |
| Elements | Heading, Text, Image, Button |
| Group elements | Image + Text pair, List |
| Spacing | Dividers and spacers for clean section breaks |
Edit a block
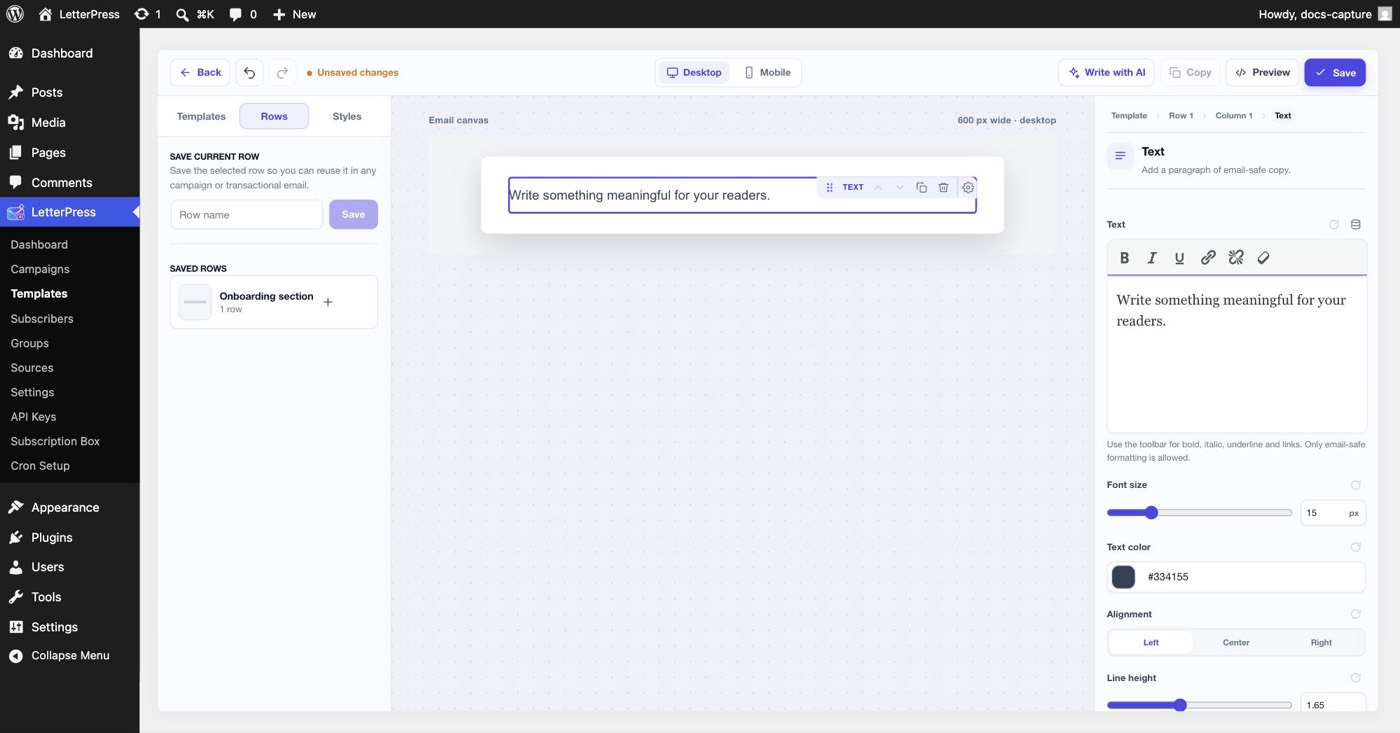
Click a block on the canvas or select it in the breadcrumb. The inspector shows its content and settings together. For a text block you get an inline editor with bold, italic, underline, and links, plus font size, text color, alignment, and line height. Only email-safe formatting is allowed, so what you see here is what subscribers get.
Using variables
Variables are placeholders that get replaced with real values when the email is sent. The template inspector lists every available variable as a chip, and the text editor has an Insert variable button.
| Variable | Replaced with |
|---|---|
{{name}} | Subscriber full name |
{{first_name}} | Subscriber first name |
{{email}} | Subscriber email address |
{{site_name}} | Your site name |
{{site_url}} | Your site URL |
{{year}} | Current year |
{{unsubscribe_url}} | Personalized unsubscribe link |
{{view_url}} | View in browser link |
{{mailing_address}} | Your organization mailing address |
Use variables in text, headings, buttons, and the subject line. A footer block already includes {{unsubscribe_url}} and {{mailing_address}} for you.
A contact without a stored name sees there in place of {{name}}. {{first_name}} uses the first word of the name and also becomes there when no name exists. That keeps greetings such as Hi {{first_name}}, readable for every subscriber.
Global styles
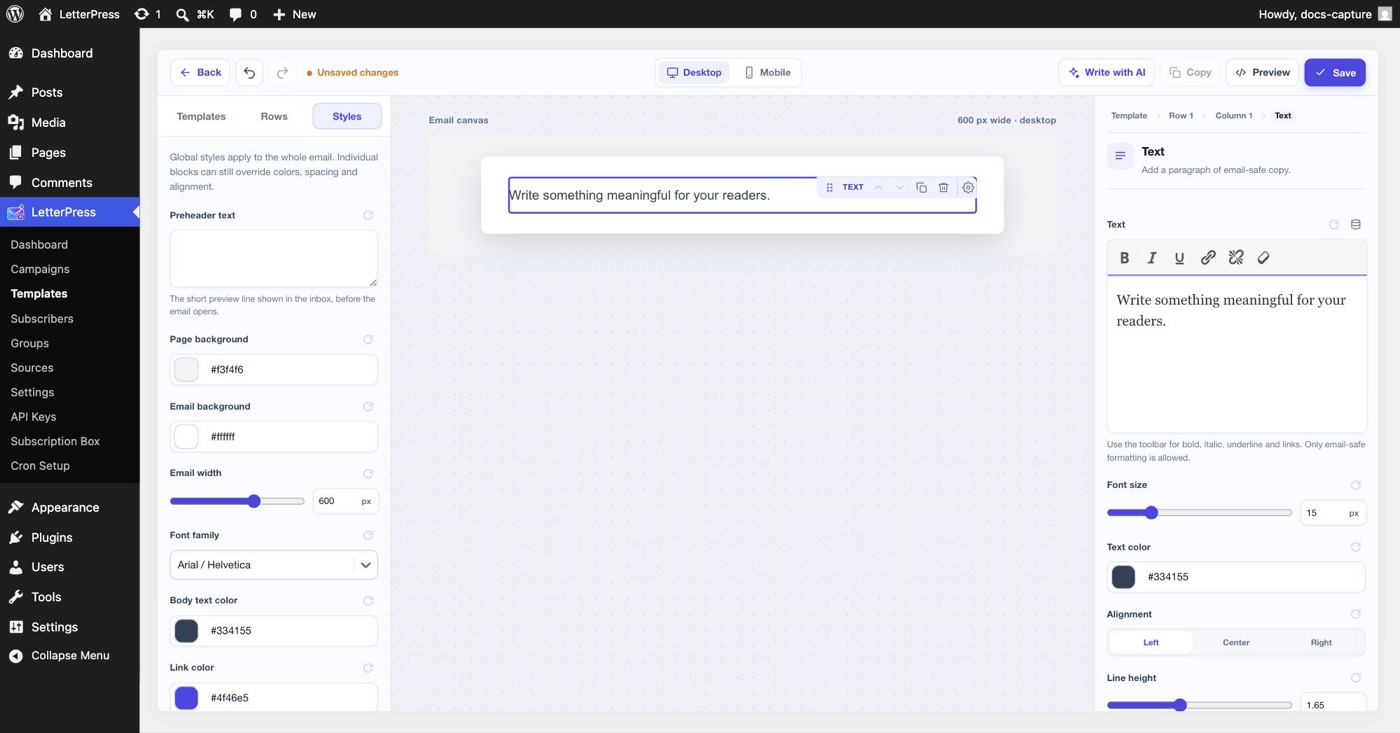
The Styles tab applies to the whole email: preheader text, page and email background colors, email width, font family, body text color, and link color. Individual blocks can still override colors, spacing, and alignment.
Preview on desktop and mobile
Use the Desktop and Mobile toggle in the toolbar. Columns stack automatically on narrow screens, and mobile view uses a fluid 100 percent width, so what you see is what phone subscribers get. Always check both before saving.
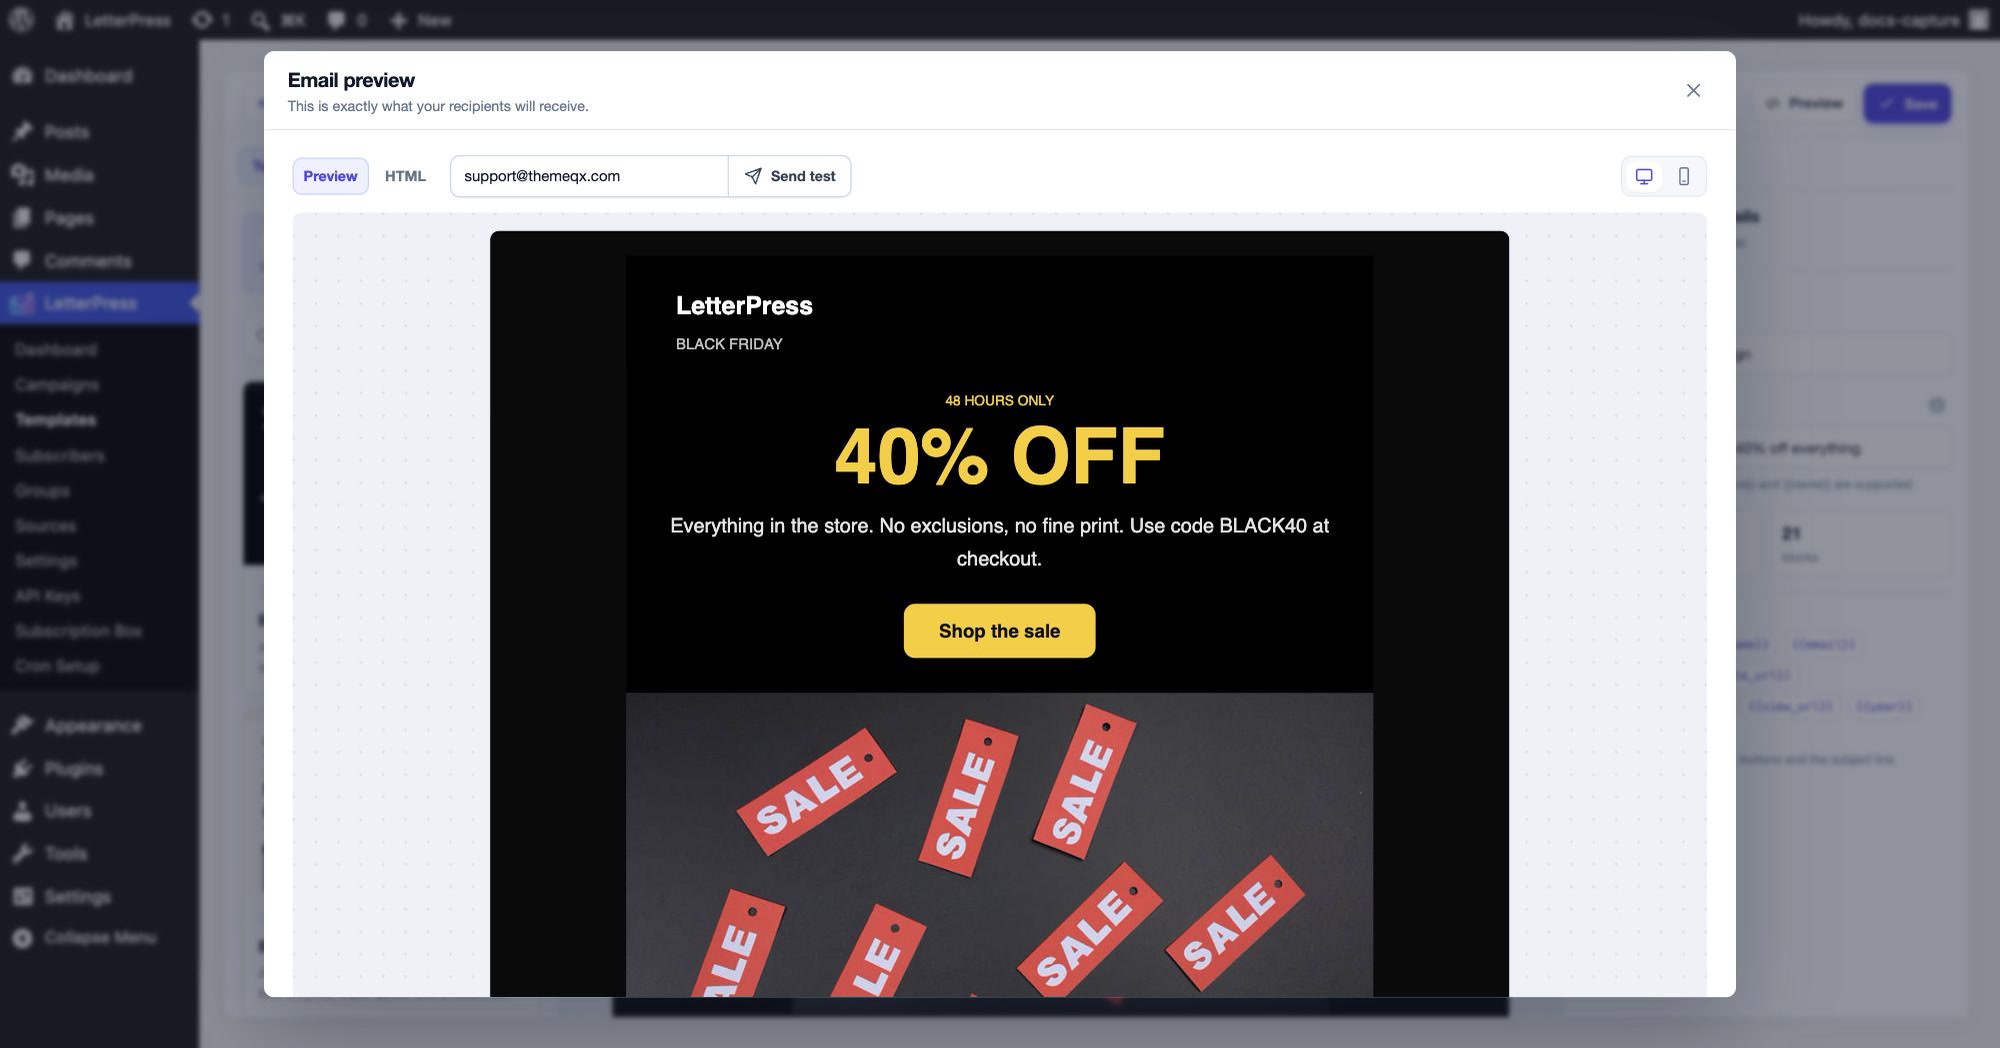
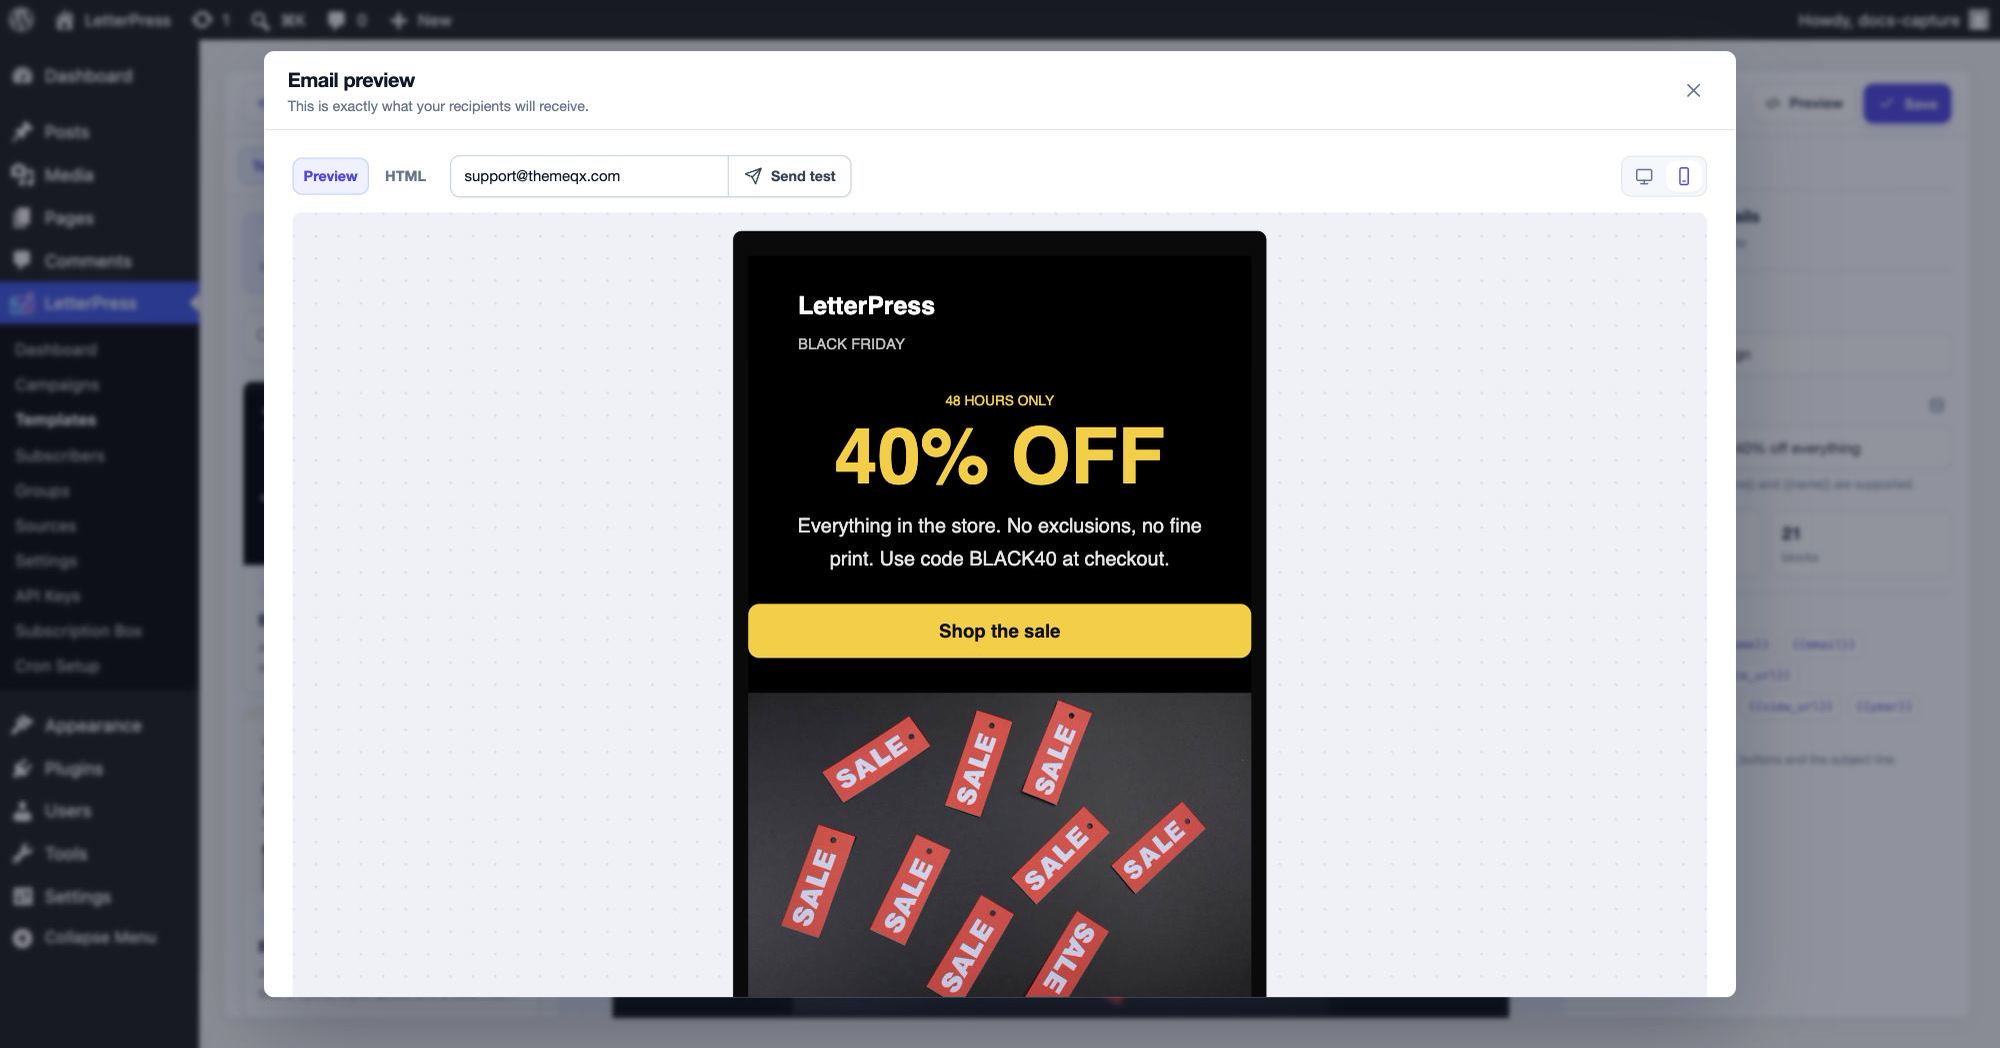
For a true inbox view, click Preview in the toolbar. The preview renders the email exactly as recipients will receive it, with your site name and variables resolved. Switch between Desktop and Mobile inside the preview, flip to the HTML tab to inspect the markup, or enter an address and click Send test to get a real copy in your inbox.
Saved rows
The Rows tab lets you reuse sections. Select a row on the canvas, give it a name, and click Save. The row then appears under Saved rows and can be dropped into any other campaign or transactional email. Global rows carry their styling with them, which keeps headers and footers consistent across designs.
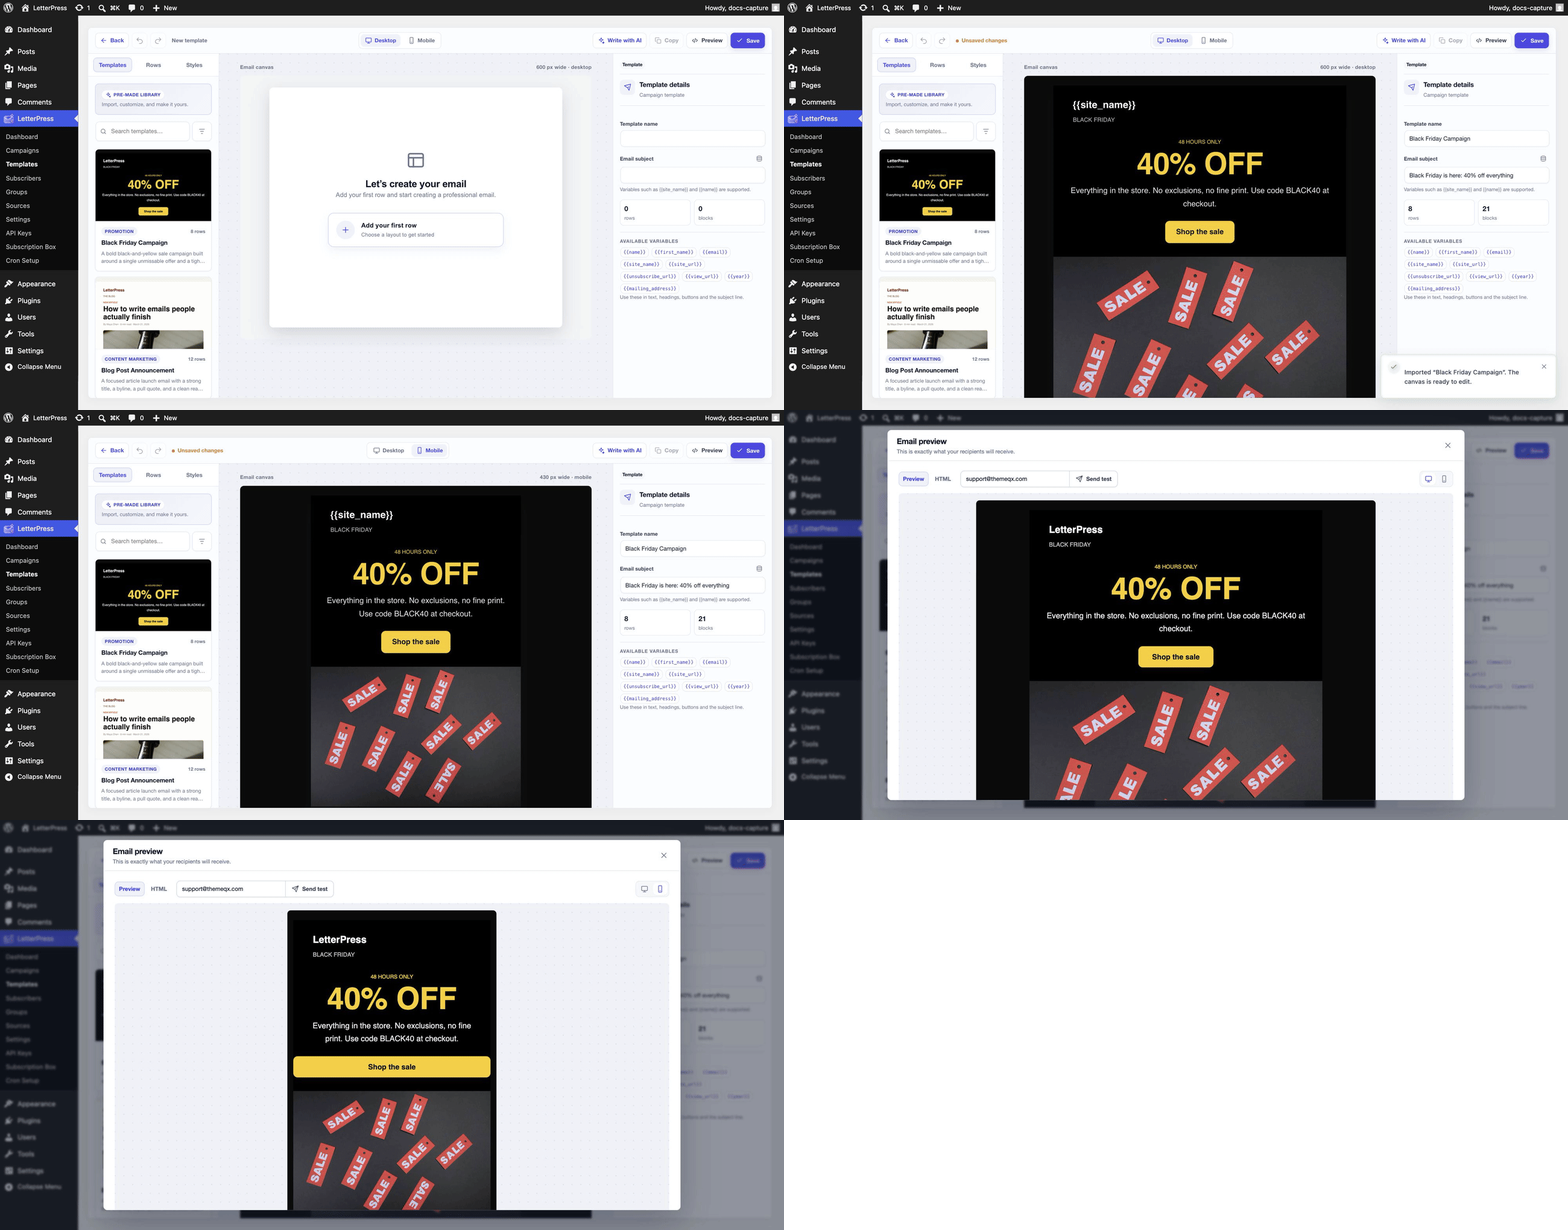
The whole flow in motion
This animation walks through the loop with a real template: open a new template, import one from the pre-made library, view it on the mobile canvas, then open the preview on desktop and mobile. Each step holds for a few seconds so you can follow along.
Next steps
- Turn a template into a newsletter with Campaigns.
- Style transactional emails like password resets with Transactional Emails.
- Let AI draft a first design with AI Email Generation, available in LetterPress Pro.